On a steep site, a visualisation needs to explain how buildings, paths and outdoor spaces connect. The work on Alpinbyen in Narvik shows how early camera studies can help identify a view that explains the project.
From an IFC model to a clear image
When Sigssoft 3D created the Alpinbyen visualisations for Qvortrup Arkitekt, the reference material included an IFC model containing terrain and buildings, drone photographs and a landscape plan. The task was to show the proposed residential development in its setting and make the connections between different levels understandable.
On a slope, the camera position affects how much of the ground between buildings is visible. A view may show the façades clearly while concealing parts of the outdoor spaces. Camera selection therefore became a distinct stage of the process, before materials and details were finalised.
The IFC model provided a starting point for working with the buildings and terrain in the same scene. Drone photographs showed the surrounding landscape, while the landscape plan informed access routes, stairs and play areas. These sources needed to be considered together when presenting the project from a particular viewpoint.
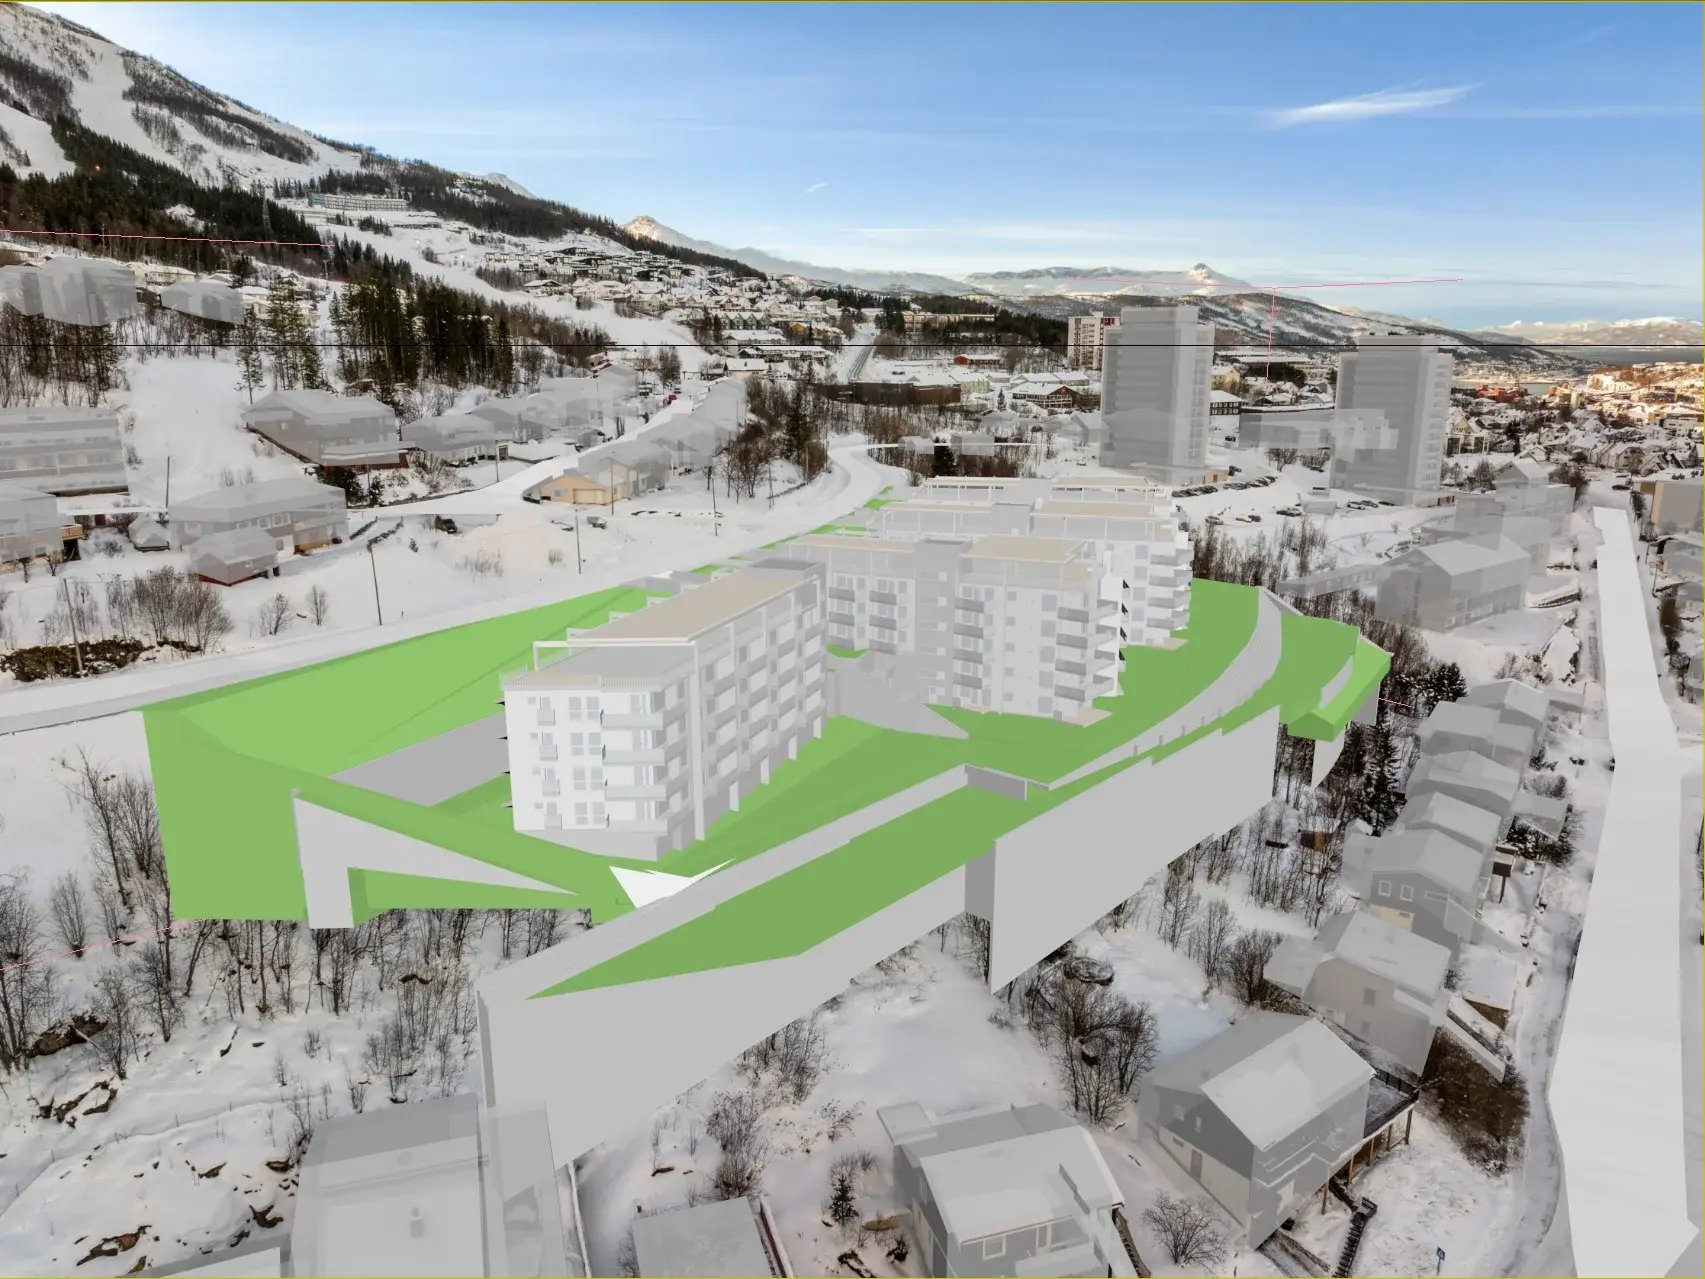 Initial camera study, 11 March 2026. A simple model composited into a drone photograph is used to assess framing and placement. Architecture: Qvortrup Arkitekt. 3D-visualisering: Sigssoft 3D
Seven camera proposals, four selected views
Seven camera proposals were considered at an early stage. The client selected four views for further development. One was subsequently adjusted after the architect asked to see the project from a higher camera position.
The first proposal showed a simple model with grey building volumes composited into a drone photograph. At this stage, framing and placement could be discussed before the image received its final materials and detailing. The revised proposal revealed more of the site from above.
The three images follow this view from the initial camera study through the revised angle to the finished visualisation. They show several stages of development: framing, detailing and outdoor spaces all evolved along the way. The sequence makes it possible to trace the camera-height decision through an actual project.
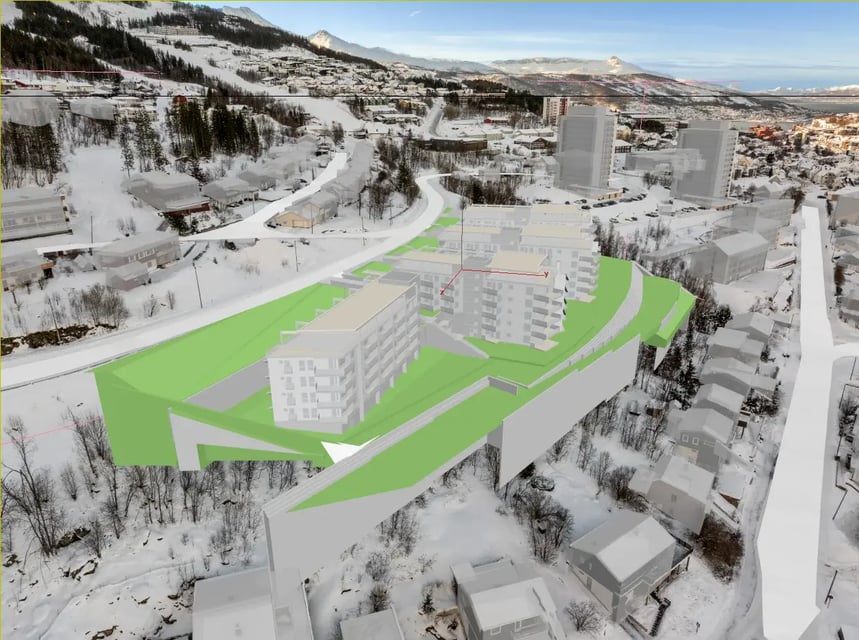 Revised camera study, 16 March 2026. The architect requested a higher viewpoint for this image. Architecture: Qvortrup Arkitekt. 3D-visualisering: Sigssoft 3D
Making the terrain understandable
After the camera was selected, work continued on the connections between levels. The footpath from Fosseveien, the play areas and the transitions to the surrounding terrain were reviewed with the architect. Retaining walls, stairs and seating steps received attention during revisions. Plants and shrubs were used to soften the visual impact of the large seating steps.
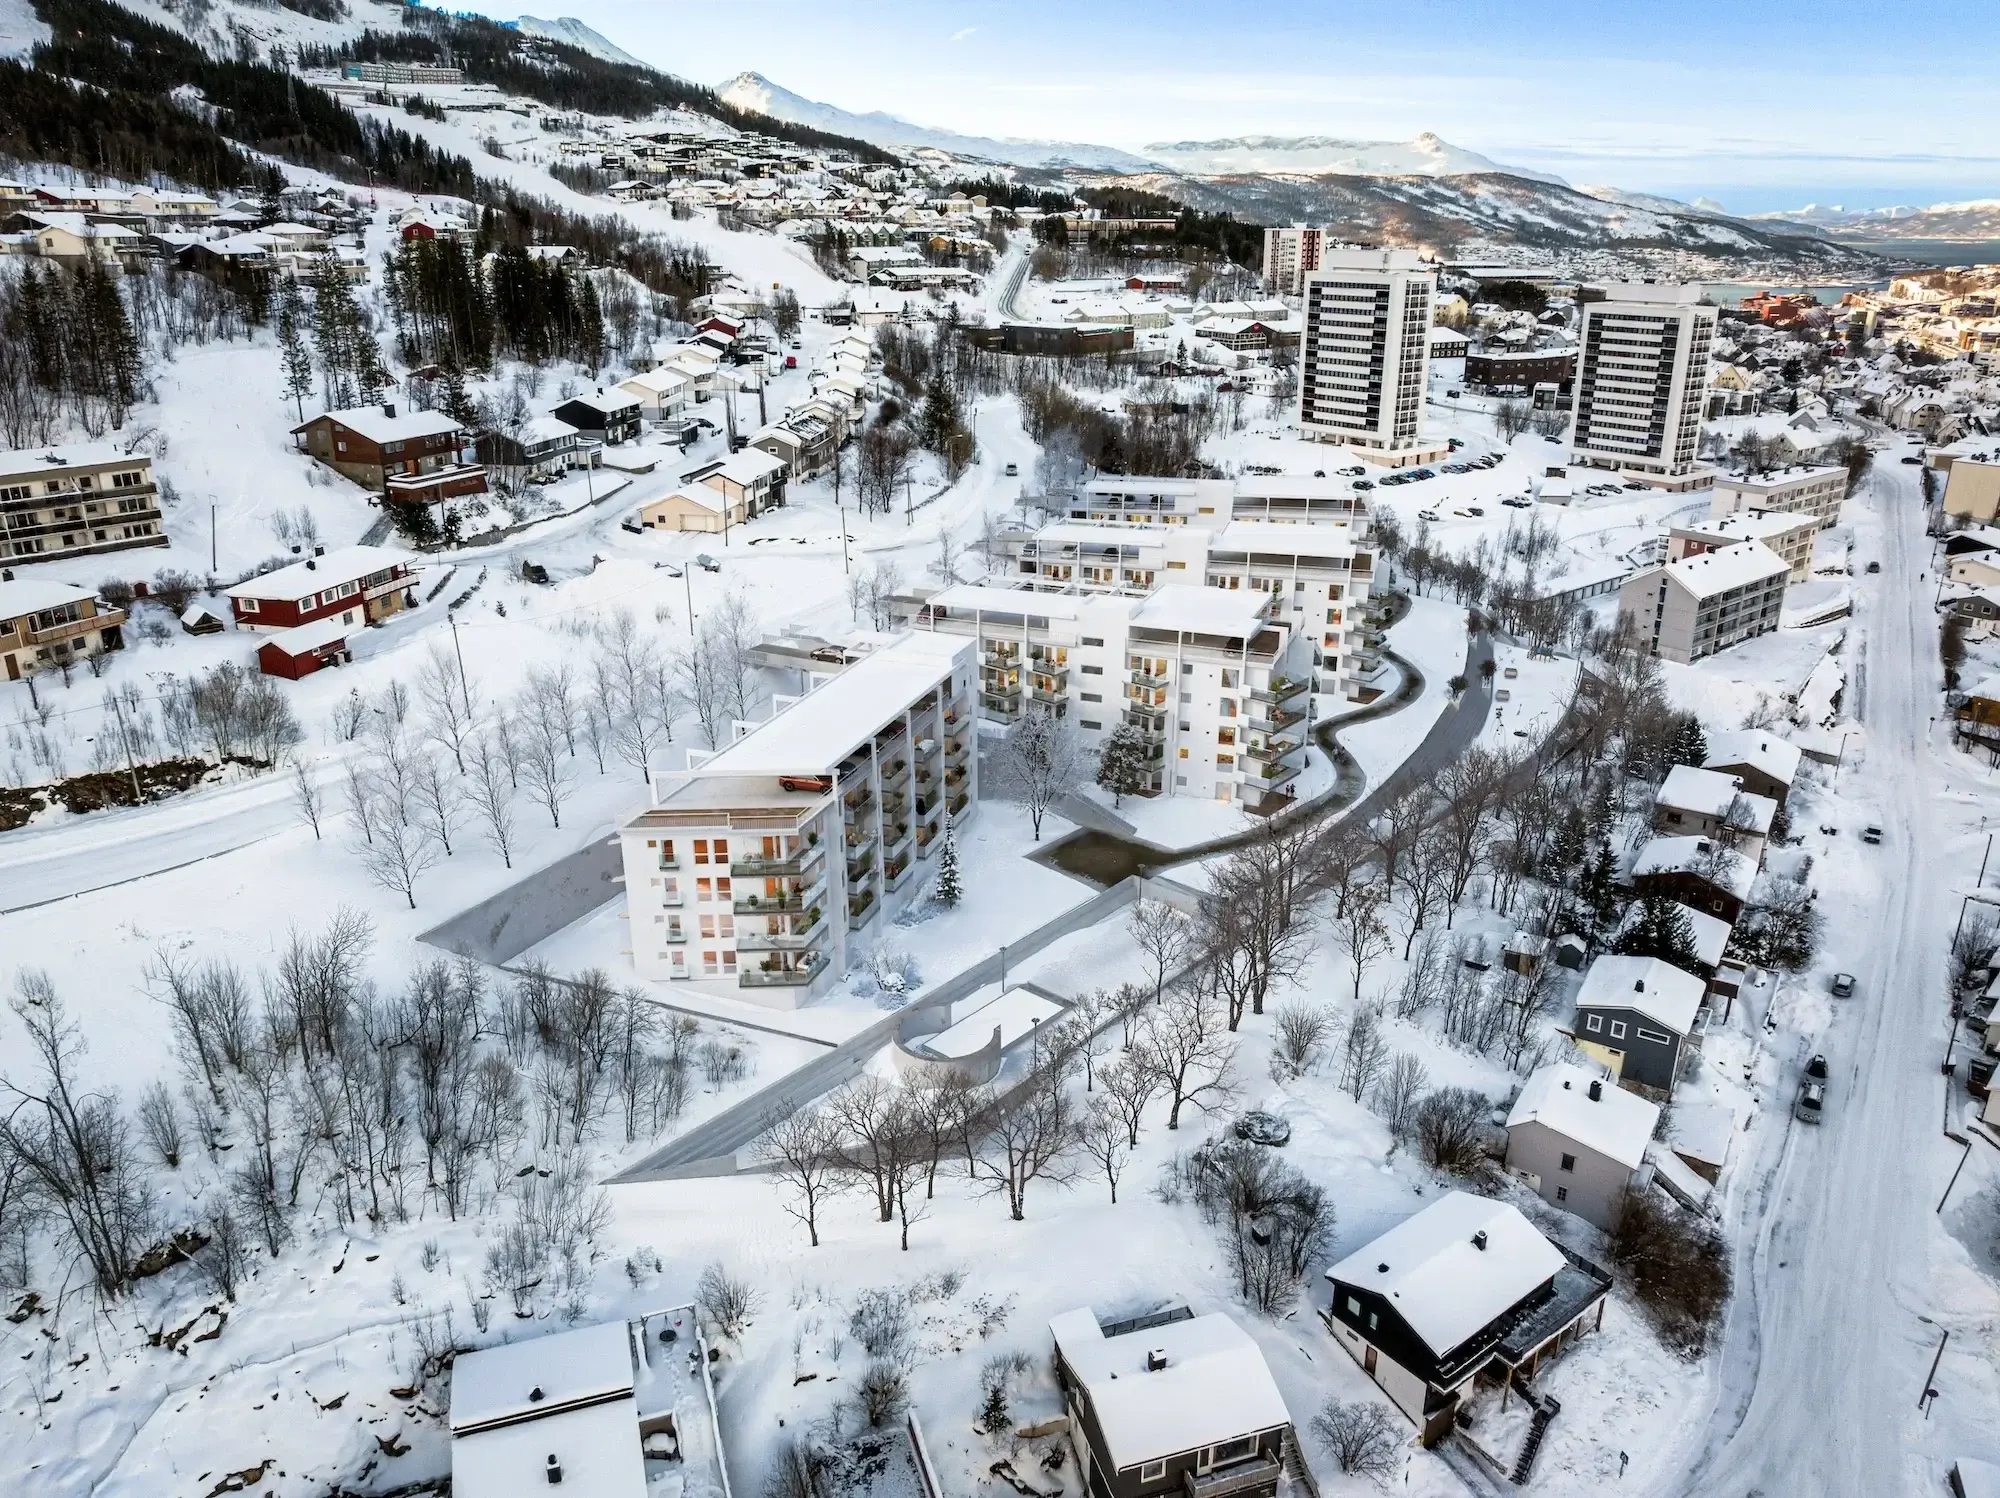
The finished view shows the buildings together with paths, landscaped outdoor spaces and the surrounding winter landscape. The visualisation brings these elements together in one image. The images depict a proposed development, and the design and details may change.
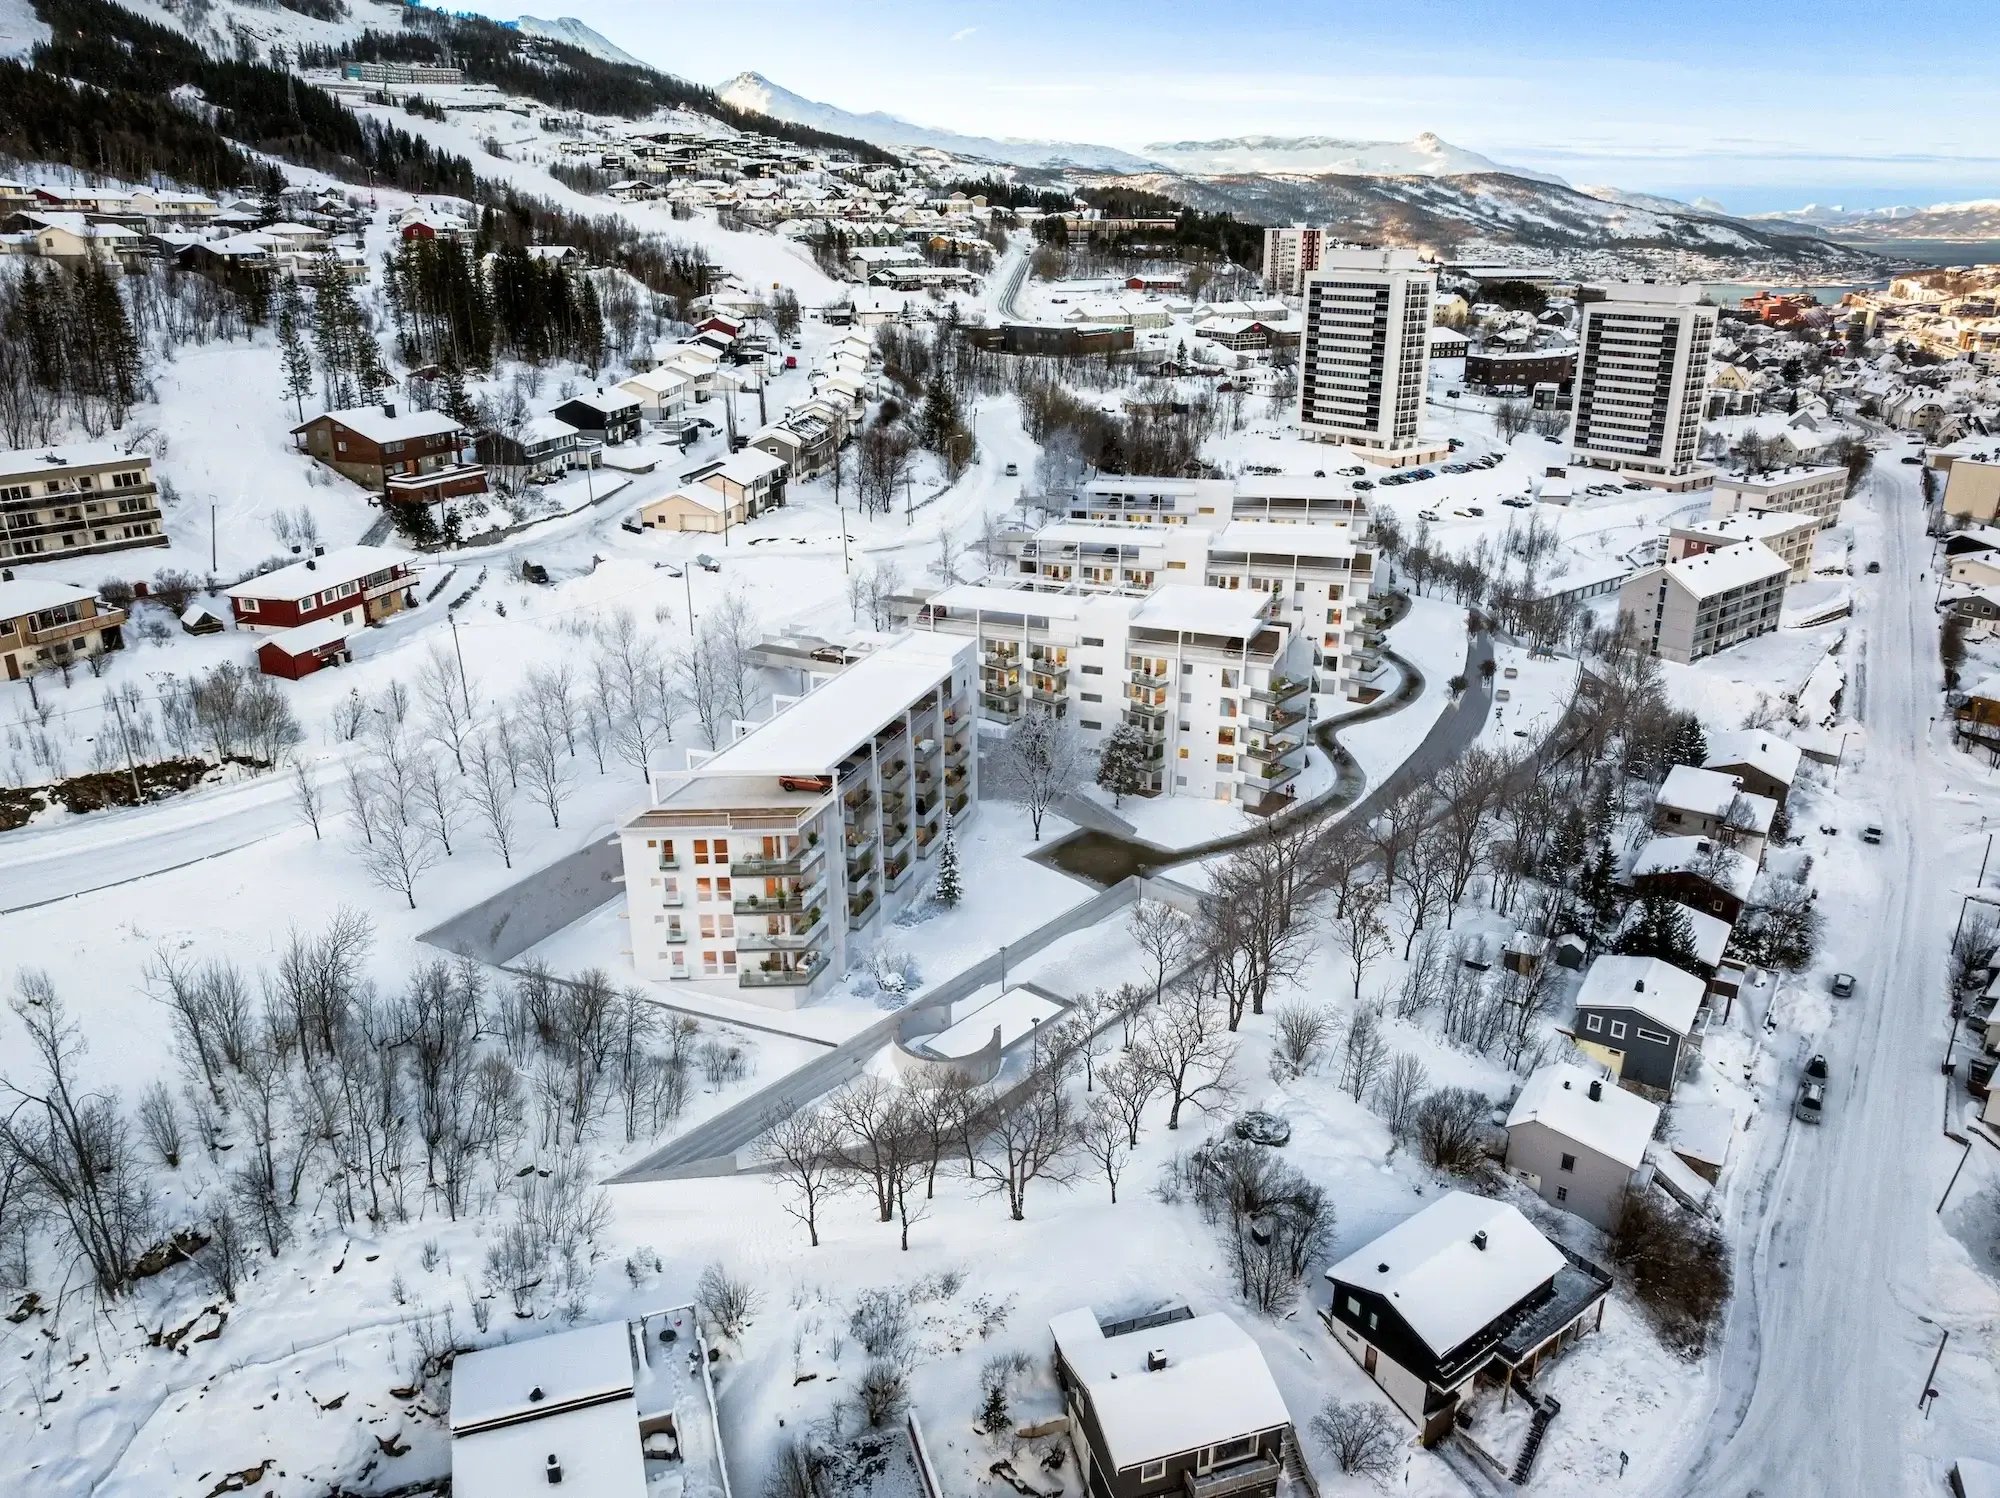 Finished visualisation of the proposed Alpinbyen development in Narvik. Buildings and landscaped outdoor spaces are composited into a drone photograph. The design and details may change. Architecture: Qvortrup Arkitekt. 3D-visualisering: Sigssoft 3D
A question to ask early
One practical lesson is to establish what each image needs to explain before choosing the final camera angle. Should it show the façade, the access route or the relationship between buildings and outdoor spaces? The answer provides a concrete basis for assessing camera proposals.
For Alpinbyen, a higher camera position was selected for one of the four views. Other views could show the project from different directions. This allowed the images to complement one another, while the working drafts gave the architect and visualisation studio something concrete to discuss and refine.
See more images and the full process in Sigssoft 3D’s Alpinbyen case study.